Last Updated: December 5, 2023
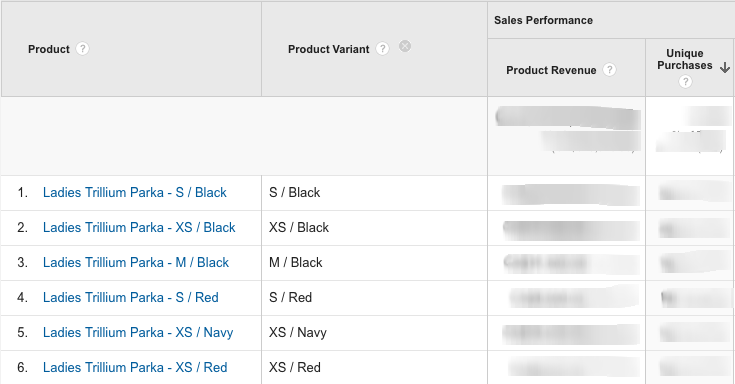
If you install the Google sales channel on Shopify, you may notice a rise in strange referrals in your Google Analytics reports.
Medium = product_sync and Campaign = sag_organic
Where do sag_organic and product_sync come from?
When the Google sales channel uploades your product feed to Google Merchant Center, it appends the following UTM tags to the product url:
| UTM Tag | Value |
|---|---|
| utm_source | |
| utm_medium | product_sync |
| utm_campaign | sag_organic |
| utm_content | sag_organic |
The following querystring is appended to your product’s link url:
&utm_medium=product_sync&utm_source=google&utm_content=sag_organic&utm_campaign=sag_organicWhy do we need these UTM parameter?
Today, you no longer need these UTM tags and you should remove them from your product urls.
These UTM parameters were created by Shopify to track organic free traffic from Google Shopping. They were meant to distinguish between organic traffic from Shopping vs organic traffic from Search.
Although well intentioned, this implementation altered the default behavior of Google Analytics, which was unexpected and not desirable.
Another issue with the Shopify implementation is that they didn’t include a canonical link in the feed. A canonical link ensures that only the “clean” version of the product link (without UTM tags) is included in Google’s search index. Without this, there is a risk that your organic search traffic will also include these UTM tags (which will really mess up your analytics).
What does sag_organic mean?
SAG stands for Surfaces Across Google.
Surfaces Across Google was the original “free shopping listings” in Google. It has since been renamed to “free shopping listings” and the name “SAG” is no longer used.
Fixing your Product Urls
If you set up Auto-Tagging correctly in both Google Ads and Google Merchant Center, Google Analytics will accurately separate Paid and Organic Shopping traffic.
Step 0
Switch to Classic Mode
To follow these steps, you need to be in Google Merchant Center “Classic” Mode. If you are instead in “Google Merchant Center Next” mode, follow these steps first:
- Click on the Help logo in the top right
- Click the last menu option “Use classic Merchant Center“
- Confirm by clicking “Switch Now“
Step 1
Remove the UTM tags
To remove the UTM parameters from your Product Links
- Go to Merchant Center > Products > Feeds
- Click on the Content API feed
- Click on the Feed Rules tab
- Click the big blue PLUS + button, type link in the field, and select link from the drop down.
- For Data Source, select Set to, type link and select link from the Primary Feed: Content API list.
- Click OK
- Set the default behaviour if the link is blank to “Leave Blank”
- Now go to Modifications > Add Modification
- Choose Optimize URL > Set Parameter
| Function | Parameter Name |
|---|---|
| Remove Parameter | utm_source |
| Remove Parameter | utm_medium |
| Remove Parameter | utm_campaign |
| Remove Parameter | utm_content |
- Click OK and look in the right side column preview to see if the link has been properly updated.
- Click Save as Draft and Apply
Step 2
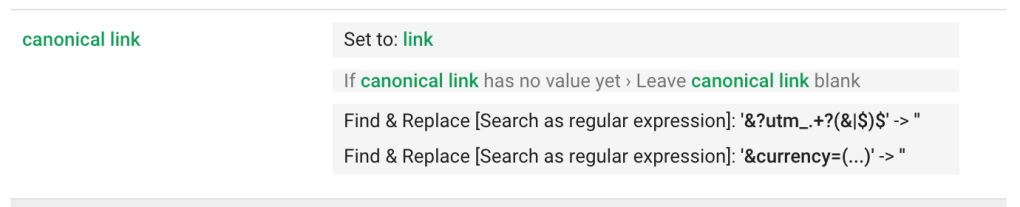
Set your Canonical Link
“If you use tracking parameters in your link attributes, it is recommend that you use the canonical_link attribute to provide a canonical URL. Use the canonical_link attribute to ensure that products are associated with the correct URL in the Google Search index.”
Google Merchant Center Help
https://support.google.com/merchants/answer/188492?hl=en
To ensure that only the “clean” non-utm version of the product link is included in Google’s search index, follow these steps.
- Go to Merchant Center > Products > Feeds
- Click on the Content API feed
- Click on the Feed Rules tab
- Click the big blue PLUS + button to add a new Rule and type canonical and choose canonical link from the drop down.
- For Data Source, select Set to, type link and select link from the Processed Attributes list.
- Click OK
- Change the default behaviour if canonical_link has no value to “leave blank”
- Add Modification > Find and Replace
Now add two Find & Replace operations: One to remove the UTM tags and another to remove the Currency parameter
| # | Find | Replace | Advanced |
|---|---|---|---|
| 1 | &?utm_.+?(&|$)$ | (leave blank) | Search as regular expression |
| 2 | ¤cy=[^s]+ | (leave blank) | Search as regular expression |
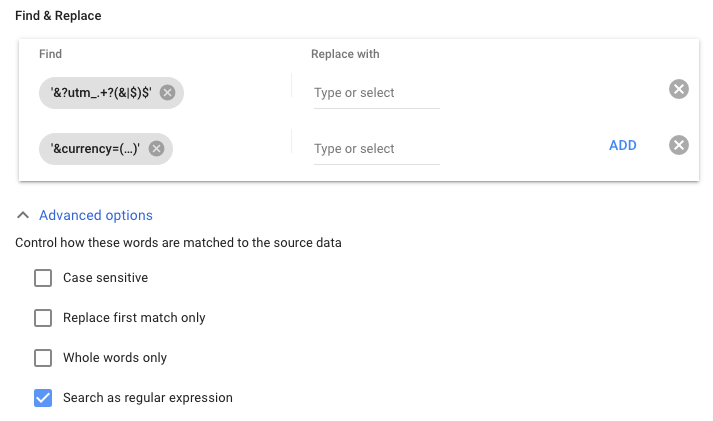
- In Advanced Options, select “Search as regular expression“
- Click OK and confirm in the right side column preview that the new link looks nice and clean, without any parameters appended.
- Click Save as Draft and Apply
Step 3
Configure Auto-Tagging
This will configure Google Ads and Google Merchant Center to properly tag your product urls.
- Google Ads (in the left hand menu)
Settings > Account Settings > Auto Tagging: ON - Google Merchant Center:
Gear Icon > Conversion Settings > Auto Tagging: ON Google Analytics:
Property Settings > Advanced Settings > Allow Manual Tagging to Override: OFF
Done!
You may need to wait a few hours for your feed to update with the new values. You should now have the default vanilla setup that Google Analytics expects.