Categories
Digital Marketing Google Ads Shopify Shopping

Enhance Shopify’s Google Shopping feed

The following script will allow you to enhance Shopify’s Google Shopping app feed to include:

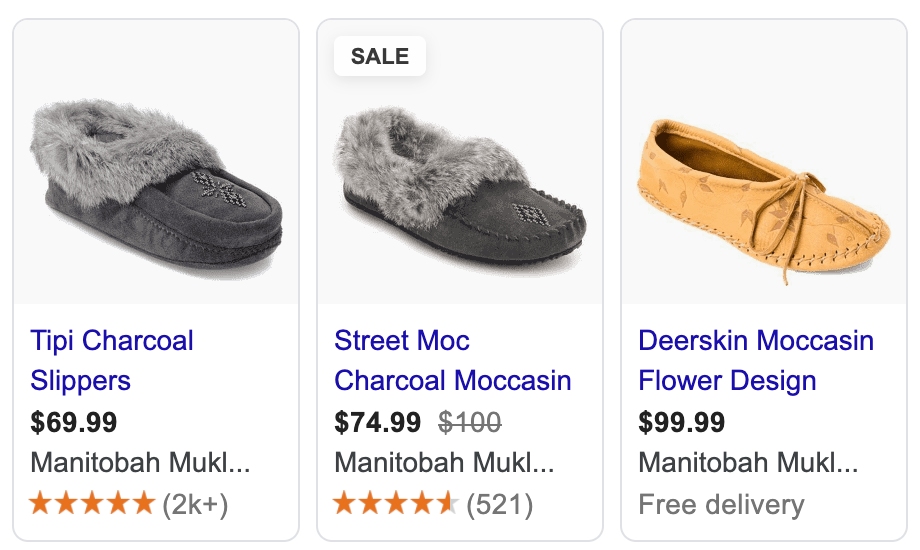
  • Additional Images by Variant: More control over which product images get associated with which variant.
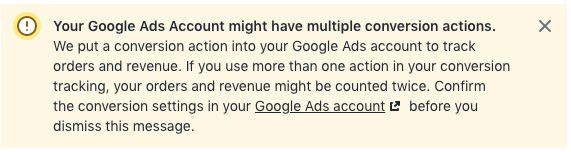
  • Exclude Out of Stock items from Google Programs. If you are paying to advertise, make sure you are only paying to display products you can sell.
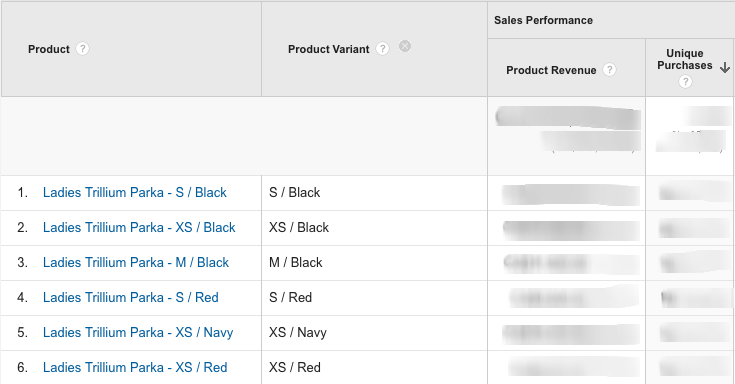
  • Exclude Low Stock variants from Google Programs. Exclude color ways that have low size options. Show other color options or products instead.
  • GTIN: Optionally set GTIN to be your barcode value
Sale annotation in Google Shopping
SALE labels and price markdown annotations usually only appear if you provide Google Shopping with both your regular price (compare_at_price) and your sale price.

To add the above functionality, you must create and upload a supplemental data feed to Google Merchant Center.

Step 1
Create a Supplemental Data Feed in Shopify

The first step is to create a data feed in Shopify. We can accomplish this by creating a custom Shopify Collection Template that will output XML data instead of HTML:

1. Create a new Collection Template called collection.google-update.liquid with the following code:

{% layout none %}<?xml version="1.0"?>
<rss xmlns:g="http://base.google.com/ns/1.0" version="2.0">

{% comment %}
Google Shopping / Merchant Center + Shopify Product Update Feed by Alex Czartoryski
https://business.czarto.com/2020/10/14/enhance-shopify-google-shopping/

This version: Aug 30, 2022
The latest version of this script available here:
https://github.com/Czarto/ShopifyScripts/blob/master/Templates/collection.google-feed-update.liquid

TODO: Test & handle products without variants
TODO: Test & hanlde products without color
TODO: Specify Sizes to never exclude. eg: Women's 7,8
{% endcomment %}

{% comment %} Settings {% endcomment %}
{%- assign exclude_unavailable_variants = true -%}
{%- assign exclude_variant_colors_with_limited_availability = false -%}
{%- assign ignore_x_smallest_sizes = 1 -%}
{%- assign ignore_x_largest_sizes = 1 -%}
{%- assign minimum_percentage_availability = 50 -%}
{%- assign filter_variantImages_byColor = false -%}
{%- assign use_barcode_as_gtin = false -%}

{%- comment -%}
TODO: Move this into a snippet and use capture to assign the variable
{%- endcomment -%}}
{%- case shop.currency -%}
{%- when 'USD' -%}{%- assign CountryCode = 'US' -%}
{%- when 'CAD' -%}{%- assign CountryCode = 'CA' -%}
{%- when 'GBP' -%}{%- assign CountryCode = 'GB' -%}
{%- when 'AUD' -%}{%- assign CountryCode = 'AU' -%}
{%- else -%}{%- assign CountryCode = 'US' -%}
{%- endcase -%}

<channel>
<title>{{ shop.name }} {{ collection.title | strip_html | strip_newlines | replace: '&', '&amp;' }}</title>
<link>{{ shop.url }}</link>
<description>{{ collection.description | strip_html | strip_newlines | replace: '&', '&amp;' }}</description>

{%- paginate collection.products by 1000 -%}
{%- for product in collection.products -%}

    {%- comment -%} Get color option {%- endcomment -%}
    {%- for option in product.options -%}
      {%- if option == 'Color' -%}{% capture option_color %}option{{ forloop.index }}{% endcapture %}{%- endif -%}
    {%- endfor -%}

    {%- comment -%} Make a list of Colors to exclude {%- endcomment -%}
    {%- assign colors_to_exclude = "" -%}
    {%- if exclude_variant_colors_with_limited_availability -%}
        {%- for color in product.options_by_name['Color'].values -%}
            {%- assign variants = product.variants | where: option_color, color -%}
            {%- assign variants_to_process_count = variants.size | minus:ignore_x_smallest_sizes | minus:ignore_x_largest_sizes -%}
            {%- assign available_count = 0 -%}
            {%- assign total_processed_count = 0 -%}
            {%- for variant in variants offset:ignore_x_smallest_sizes limit:variants_to_process_count -%}
                {%- assign total_processed_count = total_processed_count | plus:1 -%}
                {%- if variant.available -%}{%- assign available_count = available_count | plus:1 -%}{%- endif -%}
            {%- endfor -%}
            {%- if total_processed_count == 0 -%}
              {%- continue -%}
            {%- endif -%}
            {%- assign percentage_availability = available_count | times: 100.0 | divided_by: total_processed_count | round -%}
            {%- if percentage_availability < minimum_percentage_availability -%}
            {% capture colors_to_exclude %}{{colors_to_exclude}}#{{ color }}{%endcapture%}
            {%- endif -%}
        {%- endfor -%}
        {%- assign colors_to_exclude = colors_to_exclude | split: "#" -%}
    {%- endif -%}

    {%- for variant in product.variants -%}
<item>
    <g:item_group_id>shopify_{{ CountryCode }}_{{ product.id }}</g:item_group_id>
    <g:id>shopify_{{ CountryCode }}_{{ product.id }}_{{ variant.id }}</g:id>
    <g:mpn>{{ variant.sku }}</g:mpn>
    <g:barcode>{{ variant.barcode }}</g:barcode>
    {% if use_barcode_as_gtin %}<g:gtin>{{ variant.barcode }}</g:gtin>{% endif %}

    {%- comment -%} Additional Images by Color {%- endcomment -%}
    {%- assign additional_images = product.images -%}
    {%- for option in product.options -%}
    {%- if option == 'Color' -%}{% capture variant_color %}{{ variant.options[forloop.index0] }}{% endcapture %}{%- endif -%}
    {%- endfor -%}
    {% if filter_variantImages_byColor %}{% assign additional_images = product.images | where: "alt", variant_color | sort: 'attached_to_variant' | reverse%}{% endif %}
    {% if additional_images.size > 1 %}{%- for image in additional_images offset:1 limit:10 -%}
    <g:additional_image_link>https:{{ image.src | product_img_url: 'master' }}</g:additional_image_link>
    {% endfor %}{% endif %}

    {%- comment -%} Exclude Out of Stock Variants {%- endcomment -%}
    {% if exclude_unavailable_variants and variant.available == false %}
    <g:pause>ads</g:pause>
    {% elsif exclude_variant_colors_with_limited_availability and colors_to_exclude contains variant_color %}
    <g:pause>ads</g:pause>
    {% endif %}
</item>

  {% endfor %}
{% endfor %}
{% endpaginate %}
</channel>
</rss>

Available on github here

2. Create a new collection called “google-update” and choose google-update as your collection template.

3. Preview the collection and copy the url. Your url should look something like this: yourstoredomain.com/collections/google-update

Step 2
Configure your Feed

There are a few options you can configure in your feed, all located towards the top of your template file in the “configuration” section.

Exclude Out of Stock Variants
exclude_unavailable_variants

true
Exclude Limited Stock Color Variants
exclude_variant_colors_with_limited_availability
ignore_x_smallest_sizes
ignore_x_largest_sizes
minimum_percentage_availability

false
1
1
50
Filter Variant Images by Color + Alt Text Matching
filter_variantImages_byColor

false
Set GTIN to Variant’s Barcode Value
use_barcode_as_gtin

false

Exclude Out of Stock Variants

exclude_unavailable_variants = true

By default, any variants that are out of stock will be excluded from Google Shopping, Google Shopping Actions, and Dynamic Remarketing. Change the value of exclude_unavailable_variants = false if you want to disable this behaviour.

Exclude Limited Stock Color Variants

exclude_variant_colors_with_limited_availability = true

This setting is intended for apparel products, where you may have many colors of a product, but limited sizes available in a specific product. Setting this value to true will cause the script to attempt to exclude the colors with low availability (so that alternative colors or products can show instead).

There are a few additional configuration items for this setting that you can change:

minimum_percentage_availability
default = 50
Minimum % of sizes available before all variants of this color are excluded.
ignore_x_smallest_sizes
default = 1
Ignore the x smallest sizes in the % available calculation
ignore_x_largest_sizes
default = 1
Ignore the x largest sizes in the % available calculation

Filter Variant Images by Color
and Alt Text Matching

filter_variantImages_byColor = true

Setting this value to true will assign additional images to the current variant where the image’s Alt Text matches the variant’s color. Note that the primary variant’s image will always be included in the feed regardless of Alt text.

Set GTIN to Variant’s Barcode Value

use_barcode_as_gtin = true

Setting this value to true will assign your barcode value to GTIN. If you would like the option to set a different value than Barcode, it should be pretty straightforward to edit the code.

Step 3
Add a Supplemental Data Feed in Google Merchant Center

1. Open Merchant Center and go to
Products > Feeds > Supplemental Feeds > Add Supplemental Feed

NameFeed Update Script
Feed TypeScheduled Fetch
File Namegoogle-update
File Urlyourstoredomain.com/collections/google-update

Leave everything else as default values and click Continue

2. Make sure there’s a checkmark beside Content API and click Create Feed

3. You should now see your newly created feed in the Supplemental Feeds section. Click on your feed’s name and then click on Fetch Now to update your product data now.

Testing

It may take up to 30 minutes for your main feed to be updated. It is a good idea to review your products and feed to ensure that everything is coming through as expected, and tweak as required.

If everything looks good, your new sale pricing, variant images, and program availability should now be updated once per day.

Related Reading

Categories
Attribution Digital Marketing eCommerce Google Ads Shopify

Optimize Shopify’s Google Ads Conversion Tracking

Here are some essential changes to make to your Google Ads conversion tracking after you connect Shopify’s Google Shopping Channel.

STEP 0
Install the Google Shopping Channel

This guide assumes that you have the Google Shopping Channel installed on your Shopify store. If this is not the case, then:

  1. Install the Google Shopping Channel
  2. Connect your Google Account (must be an account that has access to both Google Merchant Center and Google Ads)
  3. Connect your Google Ads Account in the “Smart Shopping campaign” section

STEP 1
Remove Old Conversion Tracking Code

By connecting Shopify to Google Ads via the Google Shopping Channel, Shopify will begin sending conversion data to your Google Ads account. If you were already tracking conversions in Google Ads, then you need to make sure you are not duplicating your conversion data:

  • If you previously had a Google Ads conversion tracking script installed in your checkout, then remove that code.
  • If you were importing conversions from Google Analytics, stop importing those conversions.

STEP 2
Fix Conversion Categories

Log into Google Ads and then Go to
Tools & Settings > Measurement > Conversions

You should see a bunch of new conversion actions created by Shopify. You will also see a warning that your conversion categories are out of date, and that you should update 4 of your conversions actions.

Click Update Now and update the settings to the following:

STEP 3
Conversion Windows and Attribution Models

Although Shopify created multiple conversion actions, you only need to worry about the Google Shopping App Purchase conversion event.

Click on the Google Shopping App Purchase conversion action and update the following settings:

Old ValueNew Value
CountEvery ConversionOne
View-through Conversion Window30 days1 day
Attribution ModelLast clickLinear

One Conversion per click

If you count “Every Conversion” you increases the risk of double attribution across your various channels.

For example: A user clicks on your Google ad and makes a purchase. It makes sense to count and attribute this conversion to Google Ads. If this same user later receives your newsletter, and purchases again, then you probably want to attribute that sale to the Newsletter and NOT to Google. Setting conversion count to “One” instead of “Every” ensures that only the first sale gets attributed to google, and not the second.

Counting “Every” conversion increases the risk of double attribution

Click-Through Conversions

Arguably, you should set your Click-Through Conversion window to 30 days. 90 days seems extremely long, and could increases your chances of double attribution across multiple sales channels.

However, if you are using Smart Campaigns or Smart Bidding, the bidding algorithm can only take into account conversions that have occurred within the specified conversion window. So theoretically, the longer your conversion window, the more data for Smart Bidding to optimize with. So the 90 day click-conversion window can probably stay.

View-Through Conversions

Set the View-Through Conversion window to only 1 day. A longer View-Through conversion window is dangerous, and will lead to over attributing sales to Display Remarketing, YouTube, and Smart Shopping. This will invariably cause you to overspend on those campaigns.

A View-Through conversion window greater than 1 day is dangerous, and will lead to over attributing sales to undeserving channels.

Which Attribution Model to use?

Linear, Time Decay, Position Based, or Data Driven are all better than First or Last click, as they allow you to attribute sales across a wider range of ad interactions, which allows you to spend more evenly across your entire funnel.

I personally usually choose Linear or Position Based, as I like pushing more attribution (and therefore spend) into the top part of the funnel.

STEP 4
Enhanced Conversion Tracking

This option is still in beta, and so you may or may not have access to this in your account. At the bottom of your Purchase conversion action, you should see a section called “Enhanced Conversions”

Expand this section and enter the following settings:

  • Turn on Enhanced Conversions
  • Enter your site URL (ideally your order receipt / thank you page)
  • Choose the Global Site Tag
  • Select “Enter Javascript or CSS Selectors” (note that all of the below are case sensitive. So the first “S” of Shopify needs to be capitalized, and the remaining characters need to be lower case)
  • Email: Javascript: Shopify.checkout.email
  • Phone: Javascript: Shopify.checkout.phone
  • Name and Address: Javascript:
    • Shopify.checkout.billing_address.first_name
    • Shopify.checkout.billing_address.last_name
    • Shopify.checkout.billing_address.address1
    • Shopify.checkout.billing_address.city
    • Shopify.checkout.billing_address.province_code
    • Shopify.checkout.billing_address.country_code
    • Shopify.checkout.billing_address.zip

Click Save

Further Reading

Categories
Analytics Shopify

sag_organic and product_sync in Google Analytics

Last Updated: December 5, 2023

If you install the Google sales channel on Shopify, you may notice a rise in strange referrals in your Google Analytics reports.

Medium = product_sync and Campaign = sag_organic

Where do sag_organic and product_sync come from?

When the Google sales channel uploades your product feed to Google Merchant Center, it appends the following UTM tags to the product url:

UTM TagValue
utm_sourcegoogle
utm_mediumproduct_sync
utm_campaignsag_organic
utm_contentsag_organic

The following querystring is appended to your product’s link url:

&utm_medium=product_sync&utm_source=google&utm_content=sag_organic&utm_campaign=sag_organic

Why do we need these UTM parameter?

Today, you no longer need these UTM tags and you should remove them from your product urls.

These UTM parameters were created by Shopify to track organic free traffic from Google Shopping. They were meant to distinguish between organic traffic from Shopping vs organic traffic from Search.

Although well intentioned, this implementation altered the default behavior of Google Analytics, which was unexpected and not desirable.

Another issue with the Shopify implementation is that they didn’t include a canonical link in the feed. A canonical link ensures that only the “clean” version of the product link (without UTM tags) is included in Google’s search index. Without this, there is a risk that your organic search traffic will also include these UTM tags (which will really mess up your analytics).

What does sag_organic mean?

SAG stands for Surfaces Across Google.

Surfaces Across Google was the original “free shopping listings” in Google. It has since been renamed to “free shopping listings” and the name “SAG” is no longer used.

Fixing your Product Urls

If you set up Auto-Tagging correctly in both Google Ads and Google Merchant Center, Google Analytics will accurately separate Paid and Organic Shopping traffic.

Step 1
Remove the UTM tags

To remove the UTM parameters from your Product Links

  1. Go to Merchant Center > Products > Feeds
  2. Click on the Content API feed
  3. Click on the Feed Rules tab
  4. Click the big blue PLUS + button, type link in the field, and select link from the drop down.
  5. For Data Source, select Set to, type link and select link from the Primary Feed: Content API list.
  6. Click OK
  7. Set the default behaviour if the link is blank to “Leave Blank”
  8. Now go to Modifications > Add Modification
  9. Choose Optimize URL > Set Parameter
FunctionParameter Name
Remove Parameterutm_source
Remove Parameterutm_medium
Remove Parameterutm_campaign
Remove Parameterutm_content
  1. Click OK and look in the right side column preview to see if the link has been properly updated.
  2. Click Save as Draft and Apply

Step 2
Set your Canonical Link

“If you use tracking parameters in your link attributes, it is recommend that you use the canonical_link attribute to provide a canonical URL. Use the canonical_link attribute to ensure that products are associated with the correct URL in the Google Search index.”

Google Merchant Center Help
https://support.google.com/merchants/answer/188492?hl=en

To ensure that only the “clean” non-utm version of the product link is included in Google’s search index, follow these steps.

  1. Go to Merchant Center > Products > Feeds
  2. Click on the Content API feed
  3. Click on the Feed Rules tab
  4. Click the big blue PLUS + button to add a new Rule and type canonical and choose canonical link from the drop down.
  5. For Data Source, select Set to, type link and select link from the Processed Attributes list.
  6. Click OK
  7. Change the default behaviour if canonical_link has no value to “leave blank”
  8. Add Modification > Find and Replace
    Now add two Find & Replace operations: One to remove the UTM tags and another to remove the Currency parameter
#FindReplaceAdvanced
1&?utm_.+?(&|$)$(leave blank)Search as regular expression
2&currency=(…)(leave blank)Search as regular expression
  1. Click OK and confirm in the right side column preview that the new link looks nice and clean, without any parameters appended.
  2. Click Save as Draft and Apply
Your canonical feed rules should look something like the above

Step 3
Configure Auto-Tagging

This will configure Google Ads and Google Merchant Center to properly tag your product urls.

  1. Google Ads (in the left hand menu)
    Settings > Account Settings > Auto Tagging: ON
  2. Google Merchant Center:
    Gear Icon > Conversion Settings > Auto Tagging: ON
  3. Google Analytics:
    Property Settings > Advanced Settings > Allow Manual Tagging to Override: OFF

Done!

You may need to wait a few hours for your feed to update with the new values. You should now have the default vanilla setup that Google Analytics expects.

Categories
Digital Marketing Google Ads Shopify Shopping

Add Sale Price to Shopify’s Google Shopping feed

DEPRECATED: As of at least Aug 30, 2022, the defautlt Google sales channel properly sends the product’s sale price to Google. This post and code are no longer being maintained, and are here only for reference.

Sale annotation in Google Shopping
SALE labels and price markdown annotations usually only appear if you provide Google Shopping with both your regular price (compare_at_price) and your sale price.

Create a Price Feed in Shopify

The first step is to create a data feed in Shopify containing your products sale and regular prices. We can accomplish this by creating a custom Shopify Collection Template that will output XML data instead of HTML:

1. Create a new Collection Template

{% layout none %}<?xml version="1.0"?>
<rss xmlns:g="http://base.google.com/ns/1.0" version="2.0">
{% paginate collection.products by 1000 %}
{%- case shop.currency -%}
{%- when 'USD' -%}{%- assign CountryCode = 'US' -%}
{%- when 'CAD' -%}{%- assign CountryCode = 'CA' -%}
{%- when 'GBP' -%}{%- assign CountryCode = 'GB' -%}
{%- when 'AUD' -%}{%- assign CountryCode = 'AU' -%}
{%- else -%}{%- assign CountryCode = 'US' -%}
{%- endcase -%}
<channel>
<title>{{ shop.name }} {{ collection.title | strip_html | strip_newlines | replace: '&', '&amp;' }}</title>
<link>{{ shop.url }}</link>
<description>{{ collection.description | strip_html | strip_newlines | replace: '&', '&amp;' }}</description>
{% for product in collection.products %} 
  {% for variant in product.variants %}
    {%- if variant.compare_at_price > variant.price -%}
      {%- assign OnSale = true -%}
      {%- assign Price = variant.compare_at_price -%}
      {%- assign SalePrice = variant.price -%}
        <item>
            <g:item_group_id>shopify_{{ CountryCode }}_{{ product.id }}</g:item_group_id>
            <g:id>shopify_{{ CountryCode }}_{{ product.id }}_{{ variant.id }}</g:id>
            <g:price>{{ Price | money_without_currency }} {{ shop.currency }}</g:price>
            <g:sale_price>{{ SalePrice | money_without_currency }} {{ shop.currency }}</g:sale_price>
        </item>
    {%- endif -%}
{% endfor %}
{% endfor %}
</channel>
</rss>
{% endpaginate %}

Also available on github

2. Create a new collection called “google-feed-sale-price” based on your Collection Template

  • IMPORTANT Choose xml-pricing-feed as your collection template
  • Add products to the collection (or you can create an automatic collection with Compare At Price is Greater than 1)

3. Preview the collection and copy the url.

  • Your url should look something like this: yourstoredomain.com/collections/google-feed-sale-price
  • When you preview your page, it should look like a bunch of unformatted text on your page. If you see images, then you probably skipped the first bullet point in Step 2.

Add a Supplemental Data Feed in Google Merchant Center

4. Open Merchant Center and go to
Products > Feeds > Supplemental Feeds > Add Supplemental Feed

  • Name: Sale Pricing Update
  • Feed Type: Scheduled Fetch
  • File Name: google-feed-sale-price
  • File Url: yourstoredomain.com/collections/google-feed-sale-price

Leave everything else as default values and click Continue

5. Make sure there’s a checkmark beside Content API and click Create Feed

6. You should now see your newly created feed in the Supplemental Feeds section. Click on your feed’s name and then click on Fetch Now to update pricing data immediately.

Done

It may take up to 30 minutes for your main feed to be updated. Any new sale pricing will now be uploaded once per day.

Related Reading

Categories
Digital Marketing Facebook Ads Shopify

Fix Missing Fields in Shopify’s Facebook Product Feed

Last Update: October 19, 2021

If you use the Facebook Channel on your Shopify store, you will notice that some product attributes are missing in the product catalog:

  • Google Product Category fixed!
  • SEO Description
  • Gender
  • Material
  • Additional Images

Below is the solution to add these missing details. This will give you finer control over your Facebook Product Sets and will let you create richer dynamic ads with multiple product images.

Pre-requisites

Before we start, make sure all of the following are done:

  1. Install the Google Sales Channel
    The script leverages some of the metafields that are created on by the Google Sales Channel
  2. Install the Facebook Sales Channel
  3. Setup Empty Field Rules
    This is not actually a pre-requisite, but it’s a good backup in case things break down with your feed. This sets some default values for fields such as condition and availability.
  1. Go to Facebook Business Manager and then
    Commerce Manager > Catalog > Data Sources
  2. Click on your data feed and go to Settings
  3. Scroll down to Data Feed Rules and click on Add Rules > Set Default Values
  4. Create default values for age_group, gender, availability, condition, material, and any other fields that make sense for your business.

Step 1
Create the Facebook Product Feed Template

To create the Facebook product update feed, we will use a “hack” to transform a standard Shopify Collection page into and XML data feed:

  • In the Shopify admin, go to
    Online Store > Themes > Action > Edit Code
  • Under Templates, choose Add a new Template
  • Choose collection from the drop down and name your template facebook-feed-template

Paste the code below into your newly created template file and click Save.

{% layout none %}<?xml version="1.0"?>
<rss xmlns:g="http://base.google.com/ns/1.0" version="2.0">
{%- paginate collection.products by 1000 -%}
{%- assign useSEOdescription = true -%}
{%- assign additionalImagesForVariants = false -%}
{%- assign includeOutOfStock = false -%}
{%- assign filterVariantImagesByColor = false -%}
{% comment %}
This template is used to add additional information to the Facebook product catalog
Documentation: https://business.czarto.com/2019/12/11/update-your-shopify-facebook-product-feed-with-missing-attributes/

<comment:title>{{ product.title}} {{variant.title}}</comment:title>
{% endcomment %}
<channel>
<title>{{ shop.name }} {{ collection.title | replace: '&', '&amp;' }}</title>
<link>{{ shop.url }}</link>
<description>{{ collection.description | strip_html }}</description>
{% for product in collection.products %}
{%- assign Gender = product.metafields.mm-google-shopping.gender -%}
{%- assign AgeGroup = product.metafields.mm-google-shopping.age_group -%}
{%- assign Material = product.metafields.mm-google-shopping.material  -%}
{%- assign Color = "" -%}

{%- if product.variants.size > 0 -%}
{%- for variant in product.variants -%}
{%- if includeOutOfStock or variant.available -%}
{%- for option in product.options -%}
{%- if option == 'Color' -%}{% capture Color %}{{ variant.options[forloop.index0] }}{% endcapture %}{%- endif -%}
{%- endfor -%}

{% assign additional_images = product.images %}
{% if filterVariantImagesByColor %}{% assign additional_images = product.images | where: "alt", Color | sort: 'attached_to_variant' | reverse%}{% endif %}

<item>
<g:id>{{ variant.id }}</g:id>
<g:brand>{{ product.vendor }}</g:brand>
{% if useSEOdescription and product.metafields.global.description_tag.size > 0 %}<g:description>{{ product.metafields.global.description_tag | strip_html | strip_newlines | replace: '&', '&amp;' }}</g:description>{% endif %}
<g:product_type>{{ product.type | replace: '&', '&amp;' }}</g:product_type>
<g:mpn>{{ variant.sku }}</g:mpn>
<g:item_group_id>{{ product.id }}</g:item_group_id>
<g:content_id>{{ variant.id }}</g:content_id>
<g:material>{{ Material }}</g:material>
<g:gender>{{ Gender }}</g:gender>
<g:age_group>{{ AgeGroup }}</g:age_group>
{% if additionalImagesForVariants %}
{% if additional_images.size > 1 %}{%- for image in additional_images offset:1 limit:10 -%}
<g:additional_image_link>https:{{ image.src | product_img_url: 'master' }}</g:additional_image_link>
{% endfor %}{% endif %}
{% endif %}
</item>
{%- endif -%}
{% endfor %}
{%- else -%}

<item>
<g:id>{{ product.id }}</g:id>   
<g:brand>{{ product.vendor }}</g:brand>
{% if useSEOdescription and product.metafields.global.description_tag.size > 0 %}<description>{{ product.metafields.global.description_tag | strip_html | strip_newlines | replace: '&', '&amp;' }}</description>{% endif %} 
<g:product_type>{{ product.type | replace: '&', '&amp;' }}</g:product_type>
<g:item_group_id>{{ product.id }}</g:item_group_id>
<g:material>{{ Material }}</g:material>
<g:gender>{{ Gender }}</g:gender>
<g:age_group>{{ AgeGroup }}</g:age_group>
{% if product.images.size > 1 %}{%- for image in product.images offset:1 limit:10 -%}
<g:additional_image_link>https:{{ image.src | product_img_url: 'master' }}</g:additional_image_link>
{% endfor %}{% endif %}
</item>

{% endif %}
{% endfor %}
</channel>
</rss>
{% endpaginate %}

or download from Github

Although the script above will work as is, there are three items that you can configure:

useSEOdescription = true
Setting this to true will use your product’s SEO description. Setting to false will not upload any description (default Shopify feed will be used)

additionalImagesForVariants = false
Setting this to true will upload all your product’s additional images. If you use variants, all your variants will have the identical additional images (their primary image will be as-configured in Shopify)

filterVariantImagesByColor = false
Setting this to true will only upload additional images for a variant IF the ALT text of the images exactly match that variant’s color attribute.

Step 2
Select the Products to Send to Facebook

Now select which products will be included in your feed.

  • In Shopify Admin, go to
    Products > Collections > Create Collection
  • Enter a Title: “Facebook”
  • Add Products to the collection (either manually or using conditions). If you want to include all your products, then add a rule similar to “Inventory Stock is greater than 0”.
  • IMPORTANT!
    Assign the Facebook Feed Template to this collection.
    In the bottom right column of the page, you should see a section called Theme templates. Choose collection.facebook-feed-template otherwise none of this will work.
  • At the bottom of the page, click on Edit Website SEO and enter “facebook” as your collection url handle. (optional – but helps with remembering your feed url)
  • Save and Preview the collection. You should see unformatted text on the screen. This is your Facebook feed. Do a “View Source” in your browser to preview the XML data.
  • Copy the url of this page. It should look similar to https://www.yourstore.com/collections/facebook

Step 3
Upload your Product Feed to Facebook

  • Go to your Facebook Business Manager and go to Commerce Manager
  • Expand Catalogs in the left hand menu and select Data Sources
  • In the Supplementary Feeds section, click on Add supplementary feed
  • Click Upload Feed and choose Scheduled Feed
  • Paste in the feed url generated in Step 2 and click Next (leave Login Details blank)
  • Schedule your updates to occur daily or hourly. Turn off automatic updates (or try leaving this on — I’ve never tried it)
  • Select the data feed to update
  • Name your supplementary feed and click Upload
  • Wait for Facebook to finish fetching your feed

Done

Your products should now have the missing information added. You will probably want to repeat STEP 3 anytime you modify or add new products to your shop.

It’s just a matter of time before Shopify starts uploading the full data specs to Facebook, but until that time, this is the workaround!

Related Reading

Categories
Digital Marketing Google Ads Shopify

Google Ads Dynamic Remarketing for Shopify

Last Updated: September 25, 2020

STEP 1
Activate Dynamic Remarketing in Google

  1. Go to Google Ads > Tools & Settings > Shared Library > Audience Manager > Audience Sources
  2. Click Set up tag in the “Google Ads tag” card
  3. Remarketing: Choose “Collect data on specific actions…
  4. Business Type: Choose “Retail
  5. Retail Parameters: Select All Parameters
  6. Click Save and continue.
  7. Click on Install Tag Yourself
  8. In the first code box, look for the number at the end of the first line of code and write it down or copy it. This is your Google Conversion Id — you will need it in the next step.
<!-- Global site tag (gtag.js) - Google Ads: 123456789 -->
  1. Click Continue and then Done

STEP 2
Install the Remarketing Code in Theme.liquid

In your store’s admin section go to:

  • Online Store > Themes > Actions > Edit Code
  • Expand the Snippets section and choose Add new snippet
  • Call the snippet “adwords-remarketing
  • Paste the code below into the snippet
  • Enter your google_conversion_id that you obtained in Step 1.8 above.
{% comment %}
Google Ads Dynamic Remarketing Script by Alex Czartoryski
https://business.czarto.com/2017/02/07/shopify-dynamic-remarketing-setup/

This version: Sept 30, 2020
The latest version of this script available here:
https://github.com/Czarto/ShopifyScripts/blob/master/snippets/adwords-remarketing.liquid
{% endcomment %}

{% comment %}Set to false if GTAG is already loaded on the page. Leave to true if unsure.{%endcomment%}
{% assign load_gtag = true %}

{% comment %} Enter your google conversion id below {% endcomment %}
{% assign google_conversion_id = 123456789 %}

{% assign shopify_store_country  = 'US' %}
{% if shop.currency == 'CAD' %}
{% assign shopify_store_country  = 'CA' %}
{% elsif shop.currency == 'AUD' %}
{% assign shopify_store_country  = 'AU' %}
{% endif %}

{%if load_gtag %}
<!-- Global site tag (gtag.js) -->
<script async src="https://www.googletagmanager.com/gtag/js?id=AW-{{ google_conversion_id }}"></script>
{% endif %}
<script>
  window.dataLayer = window.dataLayer || [];
  function gtag(){dataLayer.push(arguments);}
  gtag('js', new Date());
  gtag('config', 'AW-{{ google_conversion_id }}');
</script>

{% assign google_event = false %}
{% assign google_items = false %}
{% assign google_value = false %}
{% if template contains 'cart' %}
	{% assign google_event = 'add_to_cart' %}
	{% capture google_items %}{% for item in cart.items %}{'id':'shopify_{{ shopify_store_country  }}_{{ item.product.id }}_{{ item.variant.id }}','google_business_vertical': 'retail'}{% unless forloop.last %}, {% endunless %}{% endfor %}{% endcapture %}
	{% assign google_value = cart.total_price %}
{% elsif template contains 'collection' %}
	{% assign google_event = 'view_item_list' %}
	{% capture google_items %}{% for item in collection.products limit:5 %}{'id':'shopify_{{ shopify_store_country  }}_{{ item.id }}_{{ item.variants.first.id }}','google_business_vertical': 'retail'}{% unless forloop.last %}, {% endunless %}{% endfor %}{% endcapture %}
{% elsif template contains 'product' %}
	{% assign google_event = 'view_item' %}
	{% capture google_items %}{'id':'shopify_{{ shopify_store_country  }}_{{ product.id }}_{{ product.selected_or_first_available_variant.id }}','google_business_vertical': 'retail'}{% endcapture %}
	{% assign google_value = product.selected_or_first_available_variant.price %}
{% elsif template contains 'search' %}
	{% assign google_event = 'view_search_results' %}
	{% capture google_items %}{% for item in search.results limit:5 %}{'id':'shopify_{{ shopify_store_country  }}_{{ item.id }}_{{ item.variants.first.id }}','google_business_vertical': 'retail'}{% unless forloop.last %}, {% endunless %}{% endfor %}{% endcapture %}
{% endif %}

{% if google_event %}
<script>
	gtag('event', '{{ google_event }}', {
	  'send_to': 'AW-{{ google_conversion_id }}',
	  {% if google_value %}'value': '{{ google_value | divided_by: 100.0 }}',{% endif %}
	  'items': [{{ google_items }}]
	});
</script>
{% endif %}

The latest version of this code is available on Github

Add snippet to your Theme file

Open up Layout > theme.liquid and add the following line of code before the closing </head> tag:

{% include 'adwords-remarketing' %}

STEP 3
Install Remarketing in the Checkout Scripts

  • In the very bottom left hand corner the Shopify Admin choose Settings and then Checkout
  • Scroll down to the Additional Scripts section.
  • Copy and paste the code below into the “Additional Scripts” field and update google_conversion_id with your value from step 1.8 as before.
{% comment %}
Google Ads Dynamic Remarkting Script by Alex Czartoryski https://business.czarto.com/

This version: Sep 30, 2020
The latest version of this script available here:
https://github.com/Czarto/ShopifyScripts/blob/master/settings/checkout/adwords-remarketing.liquid
{% endcomment %}

{% comment %}Set to false if GTAG is already loaded on the page. Leave to true if unsure.{%endcomment%}
{% assign load_gtag = true %}

{% if first_time_accessed %}
{% comment %} Enter your account specific values below {% endcomment %}
{% assign google_conversion_id = "123456789" %}

{% assign shopify_store_country  = 'US' %}
{% if shop.currency == 'CAD' %}
{% assign shopify_store_country  = 'CA' %}
{% elsif shop.currency == 'AUD' %}
{% assign shopify_store_country  = 'AU' %}
{% endif %}


{%if load_gtag %}
<!-- Global site tag (gtag.js) -->
<script async src="https://www.googletagmanager.com/gtag/js?id=AW-{{ google_conversion_id }}"></script>
{% endif %}
<script>
  window.dataLayer = window.dataLayer || [];
  function gtag(){dataLayer.push(arguments);}
  gtag('js', new Date());
  gtag('config', 'AW-{{ google_conversion_id }}');
</script>

<!-- Event snippet for Web Order conversion page -->
<script>
    // Google Ads Remarketing
    gtag('event', 'purchase', {
	  'send_to': 'AW-{{ google_conversion_id }}',
	  'value': '{{ total_price | divided_by: 100.0 }}',
	  'items': [{% for item in order.line_items %}{'id':'shopify_{{ shopify_store_country }}_{{ item.product.id }}_{{ item.variant.id }}','google_business_vertical': 'retail'}{% unless forloop.last %}, {% endunless %}{% endfor %}]
	});
</script>

{% endif %}

Download the lastest version from Github

STEP 4
Verification

Once you’ve installed all your code, it’s time to run through your main pages (collection, product, cart, and purchase pages) with Google Tag Assistant installed to make sure there are no errors.

Next Steps
Configure your Remarketing Audiences

Now that your store is collecting dynamic remarketing data, the next step is to properly organize and segment your visitors into Purchasers, Cart Abandoners and Product Viewers. This is covered in the next post about Google Ads Remarketing Audiences.

Additional Reading…

Categories
Digital Marketing Google Ads Shopify Shopping

Add Microdata to your Shopify Product Pages (with variant support)

If you are using Google Merchant Center to with Shopify then you have likely ran into an issue where Merchant Center will give you a warning that there is insufficient match of micro-data information and that automatic item updates are no longer being performed.

merchant-center-warning
Insufficient micro-data warnings in Google Merchant Center

This is generally due to incorrect or incomplete micro-data on your product page.

Product.liquid

All the required edits should be limited to your Product.liquid file. You need to define a Product itemscope which will have properties such as Product Url, Product Image, Product Title, and Product Description.

Nested within the Product will be an Offer itemscope that will contain the product variant’s price, currency, condition, and availability.

What complicates things is that most Shopify Themes will have at least a partial implementation of micro-data, and are perhaps only missing a few items, or perhaps don’t fully support variants.

A good idea would be to first run your product page through Google’s Structured Data Testing Tool to see which tags already exist.

Product ItemScope

1. Open your product.liquid file and add the Product itemscope property to the outer most div. The first line of your product.liquid should look something like this: 

<div itemscope itemtype="http://schema.org/Product">

2. Directly below this line, you should add the product variant’s url and image markup as so:

<meta itemprop="url" content="{{ shop.url }}{{ product.selected_or_first_available_variant.url }}" />
<meta itemprop="image" content="https:{{ product.selected_or_first_available_variant.image.src | product_img_url: 'grande' }}" />

3. Find where your product’s title and description are displayed, and add itemprop=name and itemprop=description attributes as shown below:

<!-- Product Title -->
<h1 itemprop="name">{{ product.title }}</h1>
<!-- Product description -->
<div class="product-description" itemprop="description">
{{ product.description }}
</div>

Offer ItemScope

4. Now you need to find the place in your product.liquid file where you display your price. Find a wrapping div tag and add the Offers itemscope attributes to the tag. The Offers itemscope MUST nested within the Product itemscope div tag.

<div itemprop="offers" itemscope itemtype="http://schema.org/Offer">

5. Immediately after this line you can add the product variant’s price, currency, condition, and availability microdata as so:

<meta itemprop="priceCurrency" content="{{ shop.currency }}" />
<meta itemprop="price" content="{{ product.selected_or_first_available_variant.price | money_without_currency | remove: ',' }}" />
<meta itemprop="itemCondition" itemtype="http://schema.org/OfferItemCondition" content="http://schema.org/NewCondition"/>
{% if product.selected_or_first_available_variant.available %}
  <link itemprop="availability" href="http://schema.org/InStock" />
{% else %}
  <link itemprop="availability" href="http://schema.org/OutOfStock" />
{% endif %}

Putting it all together

Once done, your product.liquid should have roughly the following structure.

<!-- BEGIN Product itemscope -->
<div itemscope itemtype="http://schema.org/Product">
  <meta itemprop="url" content="{{ shop.url }}{{ product.selected_or_first_available_variant.url }}" />
  <meta itemprop="image" content="https:{{ product.selected_or_first_available_variant.image.src | product_img_url: 'grande' }}" />
 
  <!-- Product Title & Description -->
  <h1 itemprop="name">{{ product.title }}</h1>
  <div class="product-description" itemprop="description">
  {{ product.description }}</div>
  <!-- BEGIN Offer itemscope -->
  <div itemprop="offers" itemscope itemtype="http://schema.org/Offer">
    <meta itemprop="priceCurrency" content="{{ shop.currency }}" />
    <meta itemprop="price" content="{{ product.selected_or_first_available_variant.price | money_without_currency | remove: ',' }}" />
    <meta itemprop="itemCondition" itemtype="http://schema.org/OfferItemCondition" content="http://schema.org/NewCondition"/>
    {% if product.selected_or_first_available_variant.available %}
      <link itemprop="availability" href="http://schema.org/InStock" />
    {% else %}
      <link itemprop="availability" href="http://schema.org/OutOfStock" />
    {% endif %}
  </div>
</div>

Final Steps

  1. Save and test your new product page in Google’s Structured Data Testing Tool, and fix all errors if any.
  2. Wait and check back periodically in Google Merchant center to ensure no new errors were introduced. It will take a few weeks before the “unable to update” warning disappears.

Related Reading

Categories
Facebook Ads Shopify

DIY Facebook Product Feed for Shopify

WARNING! This code is no longer maintained. Although the code in this post should still work, please use at your own risk. I recommend using the Shopify Facebook Marketing App to sync your product catalog.

Below is a free customizable DIY solution to create a Facebook Product Feed in Shopify.

  1. This is an advanced topic and assumes you have the required understanding of HTML/XML/Liquid, the Shopify Store Admin and Facebook Business Manager.
  2. There are several existing paid apps that allow you to do this without coding (Flexify and DataFeedWatch) and a free app (Facebook Marketing App by Shopify).

1. Install the Google Shopping Channel

Install Shopify’s free Google Shopping app. This will allow you to configure product properties such as Age Group, Gender, and Product Category.

2. Create an XML Collection Template

Create a custom collection template that will output your products as XML instead of HTML.

  • In the Shopify admin, go to Online Store > Themes > Action > Edit Code
  • Under Templates, choose Add a new Template
  • Choose collection from the drop down and name your template fb-product-feed

Paste the code below into your new template and click Save. (Best to copy the code from this link: Shopify Facebook Product Feed Template)

{% layout none %}<?xml version="1.0"?>
<rss xmlns:g="http://base.google.com/ns/1.0" version="2.0">
{%- paginate collection.products by 1000 -%}
{%- assign CountryCode = 'US' -%}
{%- if shop.currency == 'CAD' -%}{%- assign CountryCode = 'CA' -%}{%- endif -%}
{%- assign PriceAdjustment = 1.0 -%}
{%- assign PriceAdjustmentEffectiveDate =  '20181226T080000-0500/20190102T235900-0800' -%}

<channel>
<title>{{ shop.name }} {{ collection.title | replace: '&', '&' }}</title>
<link>{{ shop.url }}</link>
<description>{{ collection.description | strip_html }}</description>
{%- for product in collection.products -%} 
  {%- assign GoogleProductCategory = product.metafields.mm-google-shopping.google_product_category -%}
  {%- assign Gender = product.metafields.mm-google-shopping.gender -%}
  {%- assign AgeGroup = product.metafields.mm-google-shopping.age_group -%}
  {%- assign Color = "" -%}
  {%- assign Size = "" -%}

  {%- if product.variants.size > 0 -%}
  {%- for variant in product.variants -%}
    {%- for option in product.options -%}
  	  {%- if option == 'Color' -%}{% capture Color %}{{ variant.options[forloop.index0] }}{% endcapture %}
  	  {%- elsif option == 'Size' -%}{% capture Size %}{{ variant.options[forloop.index0] }}{% endcapture %}
  	  {%- endif -%}
    {%- endfor -%}

    {% comment %} Calculate Sales vs Base Pricing {% endcomment %} 
    {%- if variant.compare_at_price == blank -%}
      {%- assign BasePrice = variant.price -%}
    {%- else -%}
      {%- assign BasePrice = variant.compare_at_price -%}
    {%- endif -%}
    {%- assign SalePrice = variant.price | times: PriceAdjustment -%}

<item>
<title>{{ product.title | strip_html | strip_newlines | replace: '&', '&' }}{% unless product.title contains Color %} {{ Color | replace: '&', '&' }}{% endunless %}</title>
<link>{{ shop.url }}{{ variant.url }}</link>
<description>{{ product.title | strip_html | strip_newlines | replace: '&', '&' }} {{ variant.title | strip_html | strip_newlines | replace: '&', '&' }} {{ product.description | replace: '</', ' </' | strip_html | strip_newlines | replace: '&', '&' }}</description>
<g:google_product_category>{{ GoogleProductCategory | replace: '&', '&'  }}</g:google_product_category>
<g:item_group_id>{{ product.id }}</g:item_group_id>
<g:id>{{ variant.id }}</g:id>
<g:condition>new</g:condition>
<g:price>{{ BasePrice | money_without_currency }} {{ shop.currency }}</g:price>
{%- if SalePrice < BasePrice -%}<g:sale_price>{{ SalePrice  | money_without_currency }} {{ shop.currency }}</g:sale_price>{%-  endif -%}
{%- if PriceAdjustment < 1 -%}<g:sale_price_effective_date>{{ PriceAdjustmentEffectiveDate }}</g:sale_price_effective_date>{%- endif -%}
<g:availability>{% if variant.available %}in stock{% else %}out of stock{% endif %}</g:availability>
<g:image_link>http:{% if variant.image.src %}{{ variant.image.src | product_img_url: 'grande' }}{% else %}{{ product.featured_image.src | product_img_url: 'grande' }}{% endif %}</g:image_link>
<g:gtin>{{ variant.barcode }}</g:gtin>
<g:brand>{{ product.vendor }}</g:brand>
<g:mpn>{{ variant.sku }}</g:mpn>
<g:product_type>{{ product.type | replace: '&', '&' }}</g:product_type>
<g:age_group>{{ AgeGroup }}</g:age_group>
{% unless Color == "" %}<g:color>{{ Color | strip_html | strip_newlines | replace: '&', '&' }}</g:color>{% endunless %}
{% unless Size == "" %}<g:size>{{ Size | strip_html | strip_newlines | replace: '&', '&' }}</g:size><g:size_system>US</g:size_system>{% endunless %}
<g:gender>{{ Gender }}</g:gender>
<g:custom_label_0>{{ product.metafields.mm-google-shopping.custom_label_0 }}</g:custom_label_0>
<g:custom_label_1>{{ product.metafields.mm-google-shopping.custom_label_1 }}</g:custom_label_1>
<g:custom_label_2>{{ product.metafields.mm-google-shopping.custom_label_2 }}</g:custom_label_2>
<g:custom_label_3>{{ product.metafields.mm-google-shopping.custom_label_3 }}</g:custom_label_3>
<g:custom_label_4>{{ product.metafields.mm-google-shopping.custom_label_4 }}</g:custom_label_4>
<g:shipping_weight>{{ variant.weight | weight_with_unit }}</g:shipping_weight>
</item>

  {% endfor %}
  {% else %}

  {% comment %} Calculate Sales vs Base Pricing {% endcomment %} 
  {%- if product.compare_at_price_min == blank -%}
    {%- assign BasePrice = product.price -%}
  {%- else -%}
    {%- assign BasePrice = product.compare_at_price_min -%}
  {%- endif -%}
  {%- assign SalePrice = product.price | times: PriceAdjustment -%}

<item>
<title>{{ product.title | strip_html | strip_newlines | replace: '&', '&' }}</title>
<link>{{ shop.url }}{{ product.url }}</link>
<description>{{ product.title | strip_html | strip_newlines | replace: '&', '&' }} {{ product.description | replace: '</', ' </' | strip_html | strip_newlines | replace: '&', '&' }}</description>
<g:google_product_category>{{ GoogleProductCategory | replace: '&', '&'  }}</g:google_product_category>
<g:item_group_id>{{ product.id }}</g:item_group_id>
<g:id>{{ product.id }}</g:id>
<g:condition>new</g:condition>
<g:price>{{ BasePrice | money_without_currency }} {{ shop.currency }}</g:price>
{%- if SalePrice < BasePrice -%}<g:sale_price>{{ SalePrice  | money_without_currency }} {{ shop.currency }}</g:sale_price>{%-  endif -%}
{%- if PriceAdjustment < 1 -%}<g:sale_price_effective_date>{{ PriceAdjustmentEffectiveDate }}</g:sale_price_effective_date>{%- endif -%}
<g:availability>{% if product.available %}in stock{% else %}out of stock{% endif %}</g:availability>
<g:image_link>http:{{ product.featured_image.src | product_img_url: 'grande' }}</g:image_link>
<g:gtin>{{ product.barcode }}</g:gtin>
<g:brand>{{ product.vendor }}</g:brand>
<g:mpn>{{ product.sku }}</g:mpn>
<g:product_type>{{ product.type }}</g:product_type>
<g:age_group>{{ AgeGroup }}</g:age_group>
<g:gender>{{ Gender }}</g:gender>
<g:custom_label_0>{{ product.metafields.mm-google-shopping.custom_label_0 }}</g:custom_label_0>
<g:custom_label_1>{{ product.metafields.mm-google-shopping.custom_label_1 }}</g:custom_label_1>
<g:custom_label_2>{{ product.metafields.mm-google-shopping.custom_label_2 }}</g:custom_label_2>
<g:custom_label_3>{{ product.metafields.mm-google-shopping.custom_label_3 }}</g:custom_label_3>
<g:custom_label_4>{{ product.metafields.mm-google-shopping.custom_label_4 }}</g:custom_label_4>
<g:shipping_weight>{{ variant.weight | weight_with_unit }}</g:shipping_weight>
</item>
  {% endif %}
{% endfor %}
</channel>
</rss>
{% endpaginate %}

or Download from Github:  Shopify Facebook Product Feed Template

3. Assign products to your Feed

In Step 2 you created your feed template. Now you need to assign products to this feed:

  • In Shopify Admin, go to Products > Collections > Create Collection
  • Enter a Title: “Facebook Product Feed”
  • Add Products to the collection (either manually or using conditions)
  • IMPORTANT! Assign your feed TEMPLATE to this collection.
    In the bottom right column choose collection.fb-product-feed as the Theme Template.
  • Save and Preview the collection. You should see unformatted text on the screen. This is your Facebook feed.
  • Copy the url as you need it in the next step.

4. Upload your Feed to Facebook

  • In Facebook Business Manager go to Assets > Catalogs > Create Catalog.
  • Catalog Type: E-Commerce
  • Click Add ProductsUse Datafeed
  • Enter the feed collection url you copied in step 3 above. Leave the username & password blank. Choose a time for your daily upload to occur (early morning is usually a good time). Choose your currency.
  • Click Start Upload and wait for the feed to be fetched and processed.
  • Fix errors: If there are errors, go back, fix them, re-fetch, and keep doing so until the feed is error free. Sometimes it is necessary to delete and re-create your catalog in Facebook for some changes to appear.
  • If you have more than 1000 product variants, you will need to submit multiple feeds with a ?page=x querystring appended like so: http://mystore.myshopify.com/collections/facebook-product-feed?page=1 (This will send products 1-1000) and http://mystore.myshopify.com/collections/facebook-product-feed?page=2 (This will send products 1001-2000)

5. Prevent the Facebook Feed from Showing on your Store

Depending on how your store is setup, you may need to add some code to prevent your Facebook feed collection from showing up on your store. The exact way to do this may depend on your theme, but generally you will want to have an “unless” statement within the loop that displays your collections:

{% unless collection.title contains "Facebook" %}
... your collection code ...
{% endunless %}

Done!

You are now ready to setup your Dynamic Product Remarketing campaigns!

Related Posts

Categories
Analytics Shopify

Fix Product Performance Reports in Google Analytics with Shopify

By default, Shopify sends transactions to Google Analytics with a unique product title for each product variant. This causes the Product Performance Report to be split on the variant level instead of at the product level as it was intended.

ga-productperformance-productname
This is how Shopify data shows up by default in the Product Performance Report. Notice that the various “Trillium Parka” variants are ungrouped because of the different size and color information in the product name. This makes it difficult to see “Revenue by Product” for all “Trillium Parkas”.

If, for example. you are selling winter boots, and someone buys a size 10 in Black, Shopify will send the product name as “Winter Boots – 10 / Black” instead of just “Winter Boots“. This is a bug as as the variant details are already included in the Google Analytics “Product Variant” column.

The Solution: GA Custom Data Import

The solution to this problem is to overwrite the Shopify data using the Google Analytics Custom Data Import tool.

1: Export your Product Data

First we need to export all our product data – we can accomplish this by creating a custom Collection Template that generates a CSV report instead of the standard HTML.

a. Create a new Collection Template

Call the new collection template csv-ga-product-feed and paste the following code:

{% layout none %}{% paginate collection.products by 1000 %}ga:productSku,ga:productName,ga:productVariant{% for product in collection.products %}{% for variant in product.variants %}
{{ variant.sku }},{{ product.title | replace: ',','' | remove: '"' | remove: "'" | strip_html | strip }},{{variant.title | replace: ',','' | remove: '"' | remove: "'" | strip_html | strip }}{% endfor %}{% endfor %}{% endpaginate %}

(also available on GitHub here)

b. Create a new Collection based on your csv-ga-product-feed Template

Select the products you want to include in this feed (probably all your products). These will be the products whose values will be overwritten in Google Analytics. Call your collection “Google Analytics Product Data Import” or something similar and save it.

c. Download your Product Feed

  • View your new collection in your store (eg: store.myshopify.com/collections/google-analytics-product-data-import)
  • View source in your browser and save as HTML
  • Rename the file with a CSV extension (eg: google-analytics-product-data-import.csv)

2: Setup and Import the data into Google Analytics

WARNING! You can really mess up your Google Analytics data if things go wrong. I highly recommend that you duplicate or backup your Google Analytics view and do a trial run before working with your live data. Once you upload this new data and overwrite there is no UNDO!

a. Setup the Data Feed

  • Go to Google Analytics > Admin > Account > Property > Data Import
  • Click the red “+ NEW DATA SET” button
  • Select “Product Data”
  • Give your Data Import a name: “Product Name Override”
  • Select the Google Analytics Views you want this import to affect
  • Setup your Data Set Schema: Product SKU is the mandatory key, but select Product and Product Variant as the additional fields.
  • Overwrite Hit Data: Choose Yes (but read my warning above)
  • Click Save and Done

b. Upload your data feed

  • Click on “manage uploads” beside your new Data Feed definition
  • Click the blue UPLOAD button
  • Choose your CSV file and click UPLOAD again
  • And now wait for the upload an update to be complete

3: Verify your new data

The data upload will only affect data from this date forward. So your old data will not be fixed. But your future data will be nice and clean… Until you add new products to your store, in which case you will have to repeat this process.

You will need to wait at least a day before you start seeing the new data coming in. If you add new product SKUs to your store, you will also need to regenerate and reupload a new file in order for the new product data to be fixed.

Categories
eCommerce Google Ads Shopify Shopping

DIY Shopify xml Product Feed for Google Shopping

WARNING: This post is OUTDATED and the code is no longer maintained. Although the code should still work, please use at your own risk. I personally now use the Google Sales Channel App in combination with Merchant Center feed rules to manage my Shopping Campaigns.

The custom XML Product Feed Code is still available here: Shopify XML Product Feed Template


Here is how to build your own Shopify XML product feed to submit to Google Shopping or other platforms.

  1. Install and upload your feed using the Shopify Google Shopping App (This will setup some meta fields that are used in the script)
  2. Create a custom collection template that outputs xml
  3. Assign the products you want to publish to your new xml collection template.
  4. Submit your new xml collection url to Google Merchant Center.

Step 1: Install Shopify’s Google Shopping App

Shopify’s app is an excellent tool for managing your Google Shopping product attributes, including custom labels, product categories, etc… The custom feed we are about to build will enhance Shopify’s base feed with extra variant information and customized titles. But the base app is still needed to make use of the app’s metafields.

Step 2: Create the XML Collection Template

This step involves getting your hands dirty with code. If you are not a developer and have a low appetite for risk, consider asking a coder to do this step for you.

What we are doing here is creating a template, that when assigned to a collection, will cause that collection to be displayed as XML instead of HTML.

In your Shopify admin, go to:

  • Online Store > Themes > Edit HTML / CSS
  • Under Templates, choose Add a new Template
  • Choose collection from the drop down and name your template xml-product-feed

Paste the following code into your new template and click Save. (It is probably safer to copy and paste this code from github, as that will always be the most up to date version: Shopify xml Variant Shopping Feed)

IMPORTANT: Do not add any extra spaces before or after this code. Your very first line should be start with {% layout none %} and your very last line should be {% endpaginate %}

{% layout none %}<?xml version="1.0"?> <rss xmlns:g="http://base.google.com/ns/1.0" version="2.0"> {% paginate collection.products by 1000 %} {%- assign useSEOtitle = false -%} {%- assign useSEOdescription = false -%} {%- assign CountryCode = 'US' -%} {%- if shop.currency == 'CAD' -%}{%- assign CountryCode = 'CA' -%}{%- endif -%} {%- assign Color = "" -%} {%- assign Size = "" -%} <channel> <title>{{ shop.name }} {{ collection.title | strip_html | strip_newlines | replace: '&', '&amp;' }}</title> <link>{{ shop.url }}</link> <description>{{ collection.description | strip_html | strip_newlines | replace: '&', '&amp;' }}</description> {% for product in collection.products %}  {%- assign GoogleProductCategory = product.metafields.mm-google-shopping.google_product_category -%} {%- assign Gender = product.metafields.mm-google-shopping.gender -%} {%- assign AgeGroup = product.metafields.mm-google-shopping.age_group -%}          {% for variant in product.variants %}     {%- assign Color = "" -%}     {%- assign Size = "" -%}     {%- for option in product.options -%}    {%- if option == 'Color' -%}{%- capture Color -%}{{ variant.options[forloop.index0] }}{%- endcapture -%}    {%- elsif option == 'Size' -%}{%- capture Size -%}{{ variant.options[forloop.index0]  }}{%- endcapture -%}    {%- endif -%}    {%- endfor -%}          {%- capture productTitle -%}{{ product.vendor }} {{ product.title }}{%- endcapture -%}     {%- unless productTitle contains Color -%}{%- capture productTitle -%}{{ productTitle }} {{ Color }}{%- endcapture -%}{%- endunless -%}     {%- if useSEOtitle and product.metafields.global.title_tag.size > 0 -%}{%- assign productTitle = product.metafields.global.title_tag -%}{%- endif -%}     {%- assign productDescription = product.description -%}     {%- if useSEOdescription and product.metafields.global.description_tag.size > 0 -%}{%- assign productDescription = product.metafields.global.description_tag -%}{%- endif -%}     {%- assign OnSale = false -%}     {%- assign Price = variant.price -%}     {%- if variant.compare_at_price > variant.price -%}       {%- assign OnSale = true -%}       {%- assign Price = variant.compare_at_price -%}       {%- assign SalePrice = variant.price -%}     {%- endif -%} <item> <title>{{ productTitle | strip_html | replace: '&', '&amp;' }}</title> <link>{{ shop.url }}{{ variant.url }}</link> <description>{{ productDescription | strip_html | strip_newlines | replace: '&', '&amp;' }}</description> <g:google_product_category>{{ GoogleProductCategory | replace: '&', '&amp;'  }}</g:google_product_category> <g:item_group_id>shopify_{{ CountryCode }}_{{ product.id }}</g:item_group_id> <g:id>shopify_{{ CountryCode }}_{{ product.id }}_{{ variant.id }}</g:id> <g:condition>new</g:condition> <g:price>{{ Price | money_without_currency }} {{ shop.currency }}</g:price> {%- if OnSale -%} <g:sale_price>{{ SalePrice | money_without_currency }} {{ shop.currency }}</g:sale_price> {%- endif -%} <g:availability>{% if variant.available %}in stock{% else %}out of stock{% endif %}</g:availability> <g:image_link>http:{% if variant.image.src %}{{ variant.image.src | product_img_url: 'grande' }}{% else %}{{ product.featured_image.src | product_img_url: 'grande' }}{% endif %}</g:image_link> <g:gtin>{{ variant.barcode }}</g:gtin> <g:brand>{{ product.vendor }}</g:brand> <g:mpn>{{ variant.sku }}</g:mpn> <g:product_type>{{ product.type }}</g:product_type> <g:age_group>{{ AgeGroup }}</g:age_group> {% unless Color == "" %}<g:color>{{ Color | strip_html | strip_newlines | replace: '&', '&amp;' }}</g:color>{% endunless %} {%- unless Size == "" -%} <g:size>{{ Size | strip_html | strip_newlines | replace: '&', '&amp;' }}</g:size> <g:size_system>US</g:size_system> {%- endunless -%} <g:gender>{{ Gender }}</g:gender> <g:custom_label_0>{{ product.metafields.mm-google-shopping.custom_label_0 }}</g:custom_label_0> <g:custom_label_1>{{ product.metafields.mm-google-shopping.custom_label_1 }}</g:custom_label_1> <g:custom_label_2>{{ product.metafields.mm-google-shopping.custom_label_2 }}</g:custom_label_2> <g:custom_label_3>{{ product.metafields.mm-google-shopping.custom_label_3 }}</g:custom_label_3> <g:custom_label_4>{{ product.metafields.mm-google-shopping.custom_label_4 }}</g:custom_label_4> <g:shipping_weight>{{ variant.weight | weight_with_unit }}</g:shipping_weight> </item> {% endfor %} {% endfor %} </channel> </rss> {% endpaginate %}

or Download from Github: Shopify xml Product Feed

Step 3: Assign products to your xml Collection.

You should now have a new XML Template created. This is just the template that defines how your collection will be displayed on your site. We now need to assign products to this template so we can submit the feed to google.

This involves creating a new product collection, and choosing the xml-product-feed as the template to use:

  • Go to Products > Collections
  • Click the Add Collection button
  • Enter a name for your new collection. I recommend XML Google Shopping Feed – All if you want a single feed for all your products or XML Google Shopping Feed – Shoes if you want this feed to contain your shoe products (or other product type).
  • Add products you want published as part of this collection feed. (either manually or via dynamic rules)
  • Click Save.

Preview the collection to make sure it works. You should just see a bunch of unformatted text on the screen. If you do a “view source” in your browser, you should now see the formatted XML.

Make sure you copy the url of this collection, as you will need to submit this url to Google Merchant center.

Step 4: Submit your feed to Google Merchant

Make sure you have your xml collection url open from step 3 above.

  • Log into Google Merchant Center or create an account if you do not have one.
  • Go to Feeds and click the +Feed button to create a new feed.
  • Mode: Choose Standard or Test (recommended that you choose Test until you are sure the feed is correct)
  • Feed type: Products
  • Select your target country & language. If you have multiple target countries, you need to submit a separate feed for each.
  • Enter a descriptive name for your feed. eg: Shopify XML Feed – Shoes
  • Choose Scheduled Fetches as your input method (recommend daily)
  • Enter your collection url in the File URL field, and the collection’s filename in the name field (eg: name=google-shopping-feed-shoes and url=http://mystore.myshopify.com/collections/google-shopping-feed-shoes)
  • Save and click the Fetch Now button to download the feed. Wait a few minutes for the feed to complete.
  • Fix errors: If there are errors, Google Merchant Center will tell you in a few minutes. Go back and fix any errors, re-fetch, and keep doing so until the file is error free.

If you have more than 1000 variants, you will need to submit multiple feeds with the ?page=x querystring appended as so:

Troubleshooting

If you receive any errors, the best way to troubleshoot them is to open the the collection / feed url in your browser and do a view source. Then navigate to the line & character of the error to investigate further

Common Errors

  • Improperly formatted XML Error on Line 1: This is usually because your template has a blank line as it’s first line. Delete the blank line and make sure your template begins with {% layout none %} … exactly as in the code.
  • Improperly formatted XML Error on Line 1: The other cause of this error is that you forgot to choose the XML template for your Shopping Feed Url, and you are actually outputting HTML. Go to your collection in the Shopify Admin console and set the template correctly (at the bottom of the right hand column) 
  • Errors at Lines XXX: The xml file does not support & and > characters. These must be replaced by encoded versions &amp ; &gt ; or the feed will report errors.

(optional) Step 5: Exclude your feed collection from showing up on your store pages

If your store is setup to programatically display all your collections, then you will want to make sure your xml feed doesn’t show up. The exact way to do this will change depending on your theme, but generally you will want to have an “unless” statement within the loop that displays your collections:

{% unless collection.title contains "xml" %}
... your collection code ...
{% endunless %}

Customizing

If you have complex rules or customization that you want to apply to your feed, you have several options:

  • Use the Google Merchant Center “Feed Rules” tab to transform various values based on various conditions. This is very powerful!
  • Modify your collection template and add conditional statements based on product titles, tags, metafields, etc…
  • Create multiple collection templates with hard coded values
  • Create custom Feed Rules in Google Merchant Center
  • A combination of the above.

If you have more than 1000 variants, you will need to submit multiple feeds with the ?page=x querystring appended as so:


Related Posts & Resources