The percentage revenue spent to acquire a sale. This is a more business centric metric than ROAS, and is simpler to understand at a glance if a particular campaign is profitable or not.
An Evergreen Campaign Structure is one that does not change much year over year: Ideally the Campaigns and Ad Sets are continually in use, and only the ad creative is changed.
Evergreen Campaigns add some sanity to your Facebook Ad management. They prevent the typical disorganized Campaign sprawl that plagues most Facebook Ad Accounts. Evergreen Campaigns encourage continuous improvement and optimization, facilitates data analysis, and lowers maintenance costs.
It usually takes a few iterations before you land on your ideal evergreen structure, but here are some recommendations to get you started on the right foot.
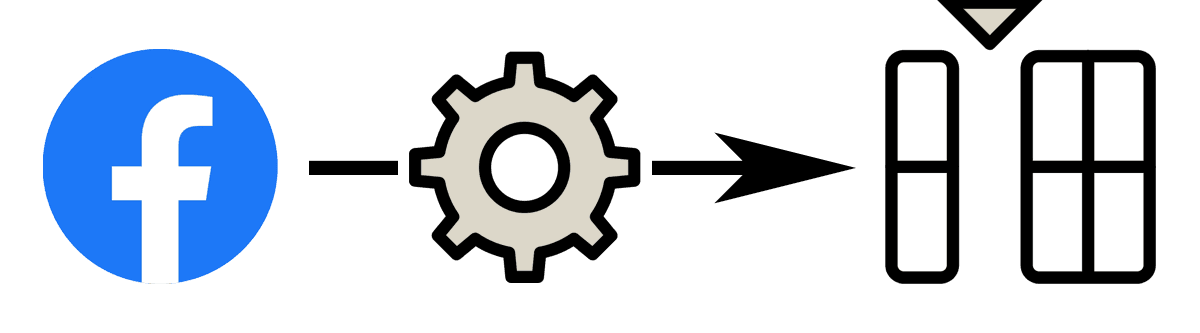
Campaign Structure Overview
The campaign structure will look like this
Dynamic Product Ads
Dynamic Product Ads, targeting people who have previously purchased and interacted with your site
Past Purchasers
People who have previously purchased from you.
Remarketing
People who have interacted with your brand but have yet not purchased from you.
Prospecting
People who have never purchased from you, and who have not interacted with your brand.
Audiences
Before you can create your campaigns, you will need to define some base audiences to capture purchasers and website visitors. A list of essential Facebook audiences that should be created is available here.
Building the Campaigns
Common Settings
All the campaigns you create will have the following settings
Buying Type
Auction
Objective
Sales
Catalog
Yes for Dynamic No for Regular
Advanced Campaign Budget
Yes
Campaign Bid Strategy
Bid Cap
Conversion Events & Attribution
Initially select “Purchase” as your converion event, with a 1-day or 7 day click only converison window.
If, however, you are unable to obtain at least 50 purchase events per week for an ad set, you will want to instead choose “Add to cart” as your conversion event, with a 1-day click only conversion window.
Campaign #1: Dynamic Product Ads
This campaign will contain all your Dynamic Product ads and ad sets. This is the most automated campaign type, with generally very little management required.
You will need to have your Product Catalog and Product Feeds setup before you can create this campaign.
Campaign Name
Dynamic Product Ads
Buying Type
Auction
Objective
Sales
Catalog
Yes
Advanced Campaign Budget
Yes
Campaign Bid Strategy
Bid Cap
Ad Sets
1. Dynamic Remarketing < 30d
Ad Set Name
Dynamic Remarketing < 30d
Performance Goal
Maximize number of conversions
Conversion Event
Purchase
Bid Control
TBD
Attribution Setting
1-day click
Product Set
All in-stock products
Audience
Create new Audience Retarget Ads: Viewed or Added to Cart but not Purchased: 30d
Audience Exclusions
None
2. Dynamic Remarketing 30d-180d
Ad Set Name
Dynamic Remarketing 30d-180d
Performance Goal
Maximize number of conversions
Conversion Event
Purchase
Bid Control
TBD
Attribution Setting
7-day click
Product Set
All in-stock products
Audience
Create new Audience Retarget Ads: Viewed or Added to Cart but not Purchased: 180d
Audience Exclusions
– Purchase All Time – AddToCart 30d – Website Visitors 30d
3. Dynamic Past Purchasers > 30d
Ad Set Name
Dynamic Past Purchasers > 30d
Performance Goal
Maximize number of conversions
Conversion Event
Purchase
Bid Control
TBD
Attribution Setting
7-day click
Product Set
All in-stock products
Audience
Create new Audience Find Prospective Customers – Purchase 180d – Purchase All Time
Create new Audience Find Prospective Customers (no explicit targeting)
Audience Exclusions
– Purchase All Time – Purchase 180d – AddToCart 180d – Website Visitors 30d – Website Visitors Top 25% 180d
For high-volume sites, or for periods of high sales such as Black Friday, you can also consider creating additional more granular ad sets, with shorter time windows, or explicitly targeting cart abandoners.
For lower-volume sites, you may need to change your conversion event to “AddToCart” instead of “Purchase” if you have less than 50 purchases per week.
Campaign #2: Past Purchasers
This campaign targets people who have previously purchased from you.
Campaign Name
Past Purchasers
Buying Type
Auction
Objective
Sales
Catalog
No
Advanced Campaign Budget
Yes
Campaign Bid Strategy
Bid Cap
Ad Sets
At it’s most basic, the campaign contains a single Ad Set containing all your past customers:
For high volume businesses that have large amount of customers, multiple Ad Sets could be created to have more granular control based on past purchase date.
Campaign #3: Remarketing
This campaign targets website visitors and people who have previously engaged with your brand on facebook, instagram, or otherwise, but who have never purchased from your business.
Campaign Name
Remarketing
Buying Type
Auction
Objective
Sales
Catalog
No
Advanced Campaign Budget
Yes
Campaign Bid Strategy
Bid Cap
Ad Sets
Ad it’s most basic, the Remarketing Campaign contains only two Ad Sets: One targeting site visitors up to 30 days ago, and another targeting site visitors up to 180 days ago (the Facebook maximum)
– Purchase All Time – Purchase 180d – Visitors 30d – FB Engagement 30d – IG Engagement 30d
For higher volume sites, you can consider adding more granular Ad Sets for 10, 60, 90 day etc… Or separating ad sets into stronger/weaker pruchase intent such as Add to Carts, Product Views, Social Engagement, etc…
Campaign #4: Prospecting
This campaign will target “brand unaware” customers. People that have never purchased from you, and that have not interacted with your brand or site in at least 180 days.
This campaign will feed your Remarketing campaigns. You can expect your Cost per Acquisition (CPA) to be relatively high, but the more you can manage to spend here, the more you will be able to spend on Remarketing.
Campaign Name
Remarketing
Buying Type
Auction
Objective
Sales
Catalog
No
Advanced Campaign Budget
Yes
Campaign Bid Strategy
Bid Cap
Ad Sets
At it’s most basic, the prospecting Campaign should target a 1% look-a-like audience (based on the Purchase pixel event).
More advanced campaigns can also target 2%-10% look-a-like audiences, or custom interest based audiences. But it is important to always exclude your Past Purchasers and lower funnel Remarketing audiences so that there is no overlap with your campaigns.
1. Prospecting 1% Look-a-Like
Ad Set Name
Prospecting 1% Look-a-Like
Performance Goal
Maximize number of conversions
Conversion Event
Purchase
Bid Control
TBD
Attribution Setting
7-day click
Audience
– 1% Look-a-like Purchase
Audience Exclusions
– Purchase All Time – Purchase 180d – Visitors 30d – Visitors Top 25% 180d
More to Explore
In a follow-up post I will give some guidelines into how to:
Calculate your Bid Caps
When (and how) to change your Conversion Event from Purchase to Add to Cart.
Building your first ads and replicating your organic posts into this campaign structure.
Below is a list of the Essential Facebook Audiences that every e-commerce DTC brand should create. Even if you don’t plan on using them right away, creating them now will ensure that you can serve ads to these users in the future.
Past Purchaser Audiences
These target users that have previously purchased from you. Larger e-commerce sites may wish to get more granular on the time-spans, but the 4 audiences cover most scenarios.
Audience Name
Source
Pixel Criteria
Purchase: 7 day
Website
Purchase: 7 days
Purchase: 30 day
Website
Purchase: 30 days
Purchase: 180 day
Website
Purchase: 180 days
Purchase: All Time
Customer List
Customer list upload*
* The “Purchase: All Time” audience will need to be updated at least every 180 days.
Remarketing Audiences
These will target website visitors, cart abandoners, and people who have engaged with your content on Facebook and Instagram. These are all people that are “brand aware” and are the lowest hanging fruit for generating sales.
Larger e-commerce sites may want to get more granular on the time-scales.
Audience Name
Source
Pixel Criteria
Add to Cart: 4 day
Website
AddToCart: 4 days
Add to Cart: 30 day
Website
AddToCart: 30 days
Add to Cart: 180 day
Website
AddToCart: 180 days
Site Visitors: Top 25%: 7 day
Website
Visitors by Time spent: Top 25%: 7 days
Site Visitors: Top 25%: 30 day
Website
Visitors by Time spent: Top 25%: 30 days
Site Visitors: Top 25%: 180 day
Website
Visitors by Time spent: Top 25%: 180 days
FB Engagement: 7 day
Facebook
Everyone who engaged with your page: 7d
FB Engagement: 30 day
Facebook
Everyone who engaged with your page: 30d
FB Engagement: 180 day
Facebook
Everyone who engaged with your page: 180d
IG Engagement: 7 day
Instagram
Everyone who engaged with your business: 7d
IG Engagement: 30 day
Instagram
Everyone who engaged with your business: 30d
IG Engagement: 180 day
Instagram
Everyone who engaged with your business: 180d
Prospecting Audiences
Lookalike audiences are a good start for new customer prospecting.
Lookalike Source
Event
Number of Audiences
Audience Markers
Facebook Pixel or Purchase: All Time
Purchase
4
0%, 1%, 2%, 5%, 10%
Choose 4 audiences, and set markers at 0%, 1%, 2%, 5%, and 10%
If you use the Facebook Channel on your Shopify store, you will notice that some product attributes are missing in the product catalog:
Google Product Categoryfixed!
SEO Description
Gender
Material
Additional Images
Below is the solution to add these missing details. This will give you finer control over your Facebook Product Sets and will let you create richer dynamic ads with multiple product images.
Pre-requisites
Before we start, make sure all of the following are done:
Install the Google Sales Channel The script leverages some of the metafields that are created on by the Google Sales Channel
Install the Facebook Sales Channel
Setup Empty Field Rules This is not actually a pre-requisite, but it’s a good backup in case things break down with your feed. This sets some default values for fields such as condition and availability.
Go to Facebook Business Manager and then Commerce Manager > Catalog > Data Sources
Click on your data feed and go to Settings
Scroll down to Data Feed Rules and click on Add Rules > Set Default Values
Create default values for age_group, gender, availability, condition, material, and any other fields that make sense for your business.
Step 1 Create the Facebook Product Feed Template
To create the Facebook product update feed, we will use a “hack” to transform a standard Shopify Collection page into and XML data feed:
In the Shopify admin, go to Online Store > Themes > Action > Edit Code
Under Templates, choose Add a new Template
Choose collection from the drop down and name your template facebook-feed-template
Paste the code below into your newly created template file and click Save.
{% layout none %}<?xml version="1.0"?>
<rss xmlns:g="http://base.google.com/ns/1.0" version="2.0">
{%- paginate collection.products by 1000 -%}
{%- assign useSEOdescription = true -%}
{%- assign additionalImagesForVariants = false -%}
{%- assign includeOutOfStock = false -%}
{%- assign filterVariantImagesByColor = false -%}
{% comment %}
This template is used to add additional information to the Facebook product catalog
Documentation: https://business.czarto.com/2019/12/11/update-your-shopify-facebook-product-feed-with-missing-attributes/
<comment:title>{{ product.title}} {{variant.title}}</comment:title>
{% endcomment %}
<channel>
<title>{{ shop.name }} {{ collection.title | replace: '&', '&' }}</title>
<link>{{ shop.url }}</link>
<description>{{ collection.description | strip_html }}</description>
{% for product in collection.products %}
{%- assign Gender = product.metafields.mm-google-shopping.gender -%}
{%- assign AgeGroup = product.metafields.mm-google-shopping.age_group -%}
{%- assign Material = product.metafields.mm-google-shopping.material -%}
{%- assign Color = "" -%}
{%- if product.variants.size > 0 -%}
{%- for variant in product.variants -%}
{%- if includeOutOfStock or variant.available -%}
{%- for option in product.options -%}
{%- if option == 'Color' -%}{% capture Color %}{{ variant.options[forloop.index0] }}{% endcapture %}{%- endif -%}
{%- endfor -%}
{% assign additional_images = product.images %}
{% if filterVariantImagesByColor %}{% assign additional_images = product.images | where: "alt", Color | sort: 'attached_to_variant' | reverse%}{% endif %}
<item>
<g:id>{{ variant.id }}</g:id>
<g:brand>{{ product.vendor }}</g:brand>
{% if useSEOdescription and product.metafields.global.description_tag.size > 0 %}<g:description>{{ product.metafields.global.description_tag | strip_html | strip_newlines | replace: '&', '&' }}</g:description>{% endif %}
<g:product_type>{{ product.type | replace: '&', '&' }}</g:product_type>
<g:mpn>{{ variant.sku }}</g:mpn>
<g:item_group_id>{{ product.id }}</g:item_group_id>
<g:content_id>{{ variant.id }}</g:content_id>
<g:material>{{ Material }}</g:material>
<g:gender>{{ Gender }}</g:gender>
<g:age_group>{{ AgeGroup }}</g:age_group>
{% if additionalImagesForVariants %}
{% if additional_images.size > 1 %}{%- for image in additional_images offset:1 limit:10 -%}
<g:additional_image_link>https:{{ image.src | product_img_url: 'master' }}</g:additional_image_link>
{% endfor %}{% endif %}
{% endif %}
</item>
{%- endif -%}
{% endfor %}
{%- else -%}
<item>
<g:id>{{ product.id }}</g:id>
<g:brand>{{ product.vendor }}</g:brand>
{% if useSEOdescription and product.metafields.global.description_tag.size > 0 %}<description>{{ product.metafields.global.description_tag | strip_html | strip_newlines | replace: '&', '&' }}</description>{% endif %}
<g:product_type>{{ product.type | replace: '&', '&' }}</g:product_type>
<g:item_group_id>{{ product.id }}</g:item_group_id>
<g:material>{{ Material }}</g:material>
<g:gender>{{ Gender }}</g:gender>
<g:age_group>{{ AgeGroup }}</g:age_group>
{% if product.images.size > 1 %}{%- for image in product.images offset:1 limit:10 -%}
<g:additional_image_link>https:{{ image.src | product_img_url: 'master' }}</g:additional_image_link>
{% endfor %}{% endif %}
</item>
{% endif %}
{% endfor %}
</channel>
</rss>
{% endpaginate %}
Although the script above will work as is, there are three items that you can configure:
useSEOdescription = true Setting this to true will use your product’s SEO description. Setting to false will not upload any description (default Shopify feed will be used)
additionalImagesForVariants = false Setting this to true will upload all your product’s additional images. If you use variants, all your variants will have the identical additional images (their primary image will be as-configured in Shopify)
filterVariantImagesByColor = false Setting this to true will only upload additional images for a variant IF the ALT text of the images exactly match that variant’s color attribute.
Step 2 Select the Products to Send to Facebook
Now select which products will be included in your feed.
In Shopify Admin, go to Products > Collections > Create Collection
Enter a Title: “Facebook”
Add Products to the collection (either manually or using conditions). If you want to include all your products, then add a rule similar to “Inventory Stock is greater than 0”.
IMPORTANT! Assign the Facebook Feed Template to this collection. In the bottom right column of the page, you should see a section called Theme templates. Choose collection.facebook-feed-templateotherwise none of this will work.
At the bottom of the page, click on Edit Website SEO and enter “facebook” as your collection url handle. (optional – but helps with remembering your feed url)
Save and Preview the collection. You should see unformatted text on the screen. This is your Facebook feed. Do a “View Source” in your browser to preview the XML data.
Go to your Facebook Business Manager and go to Commerce Manager
Expand Catalogs in the left hand menu and select Data Sources
In the Supplementary Feeds section, click on Add supplementary feed
Click Upload Feed and choose Scheduled Feed
Paste in the feed url generated in Step 2 and click Next (leave Login Details blank)
Schedule your updates to occur daily or hourly. Turn off automatic updates (or try leaving this on — I’ve never tried it)
Select the data feed to update
Name your supplementary feed and click Upload
Wait for Facebook to finish fetching your feed
Done
Your products should now have the missing information added. You will probably want to repeat STEP 3 anytime you modify or add new products to your shop.
It’s just a matter of time before Shopify starts uploading the full data specs to Facebook, but until that time, this is the workaround!
Once a week (or sometimes daily if we are in a period of high activity or if we have launched a new promotion), first thing in the morning, I look at the past 7 days and run the above formula for each of my campaigns.
If my target ROAS is very close to my actual ROAS, then I don’t bother with the calculation, nor with adjusting budgets.
If the results call for a decrease, then I decrease the budgets.
If the results call for an increase, then I increase budgets, but usually by no more than 10%.
WARNING! This code is no longer maintained. Although the code in this post should still work, please use at your own risk. I recommend using the Shopify Facebook Marketing App to sync your product catalog.
Below is a free customizable DIY solution to create a Facebook Product Feed in Shopify.
This is an advanced topic and assumes you have the required understanding of HTML/XML/Liquid, the Shopify Store Admin and Facebook Business Manager.
Enter the feed collection url you copied in step 3 above. Leave the username & password blank. Choose a time for your daily upload to occur (early morning is usually a good time). Choose your currency.
Click Start Upload and wait for the feed to be fetched and processed.
Fix errors: If there are errors, go back, fix them, re-fetch, and keep doing so until the feed is error free. Sometimes it is necessary to delete and re-create your catalog in Facebook for some changes to appear.
5. Prevent the Facebook Feed from Showing on your Store
Depending on how your store is setup, you may need to add some code to prevent your Facebook feed collection from showing up on your store. The exact way to do this may depend on your theme, but generally you will want to have an “unless” statement within the loop that displays your collections: